Connector 3D
Connector 3D
The «Connector 3D 
Placing a Connector 3D on a Custom Part
Supported types of connections are:
- Face to Side
- Face to Face
The modebar of the tool offers a pulldown menu for the connector housings and one for the connector bolts.

The connector bolts are filtered by connector housings. The connector bolts are only filtered for matching connector housings by series, not for the current construction situation. After choosing a combination of valid housing / bolt combination, the connector can be inserted.
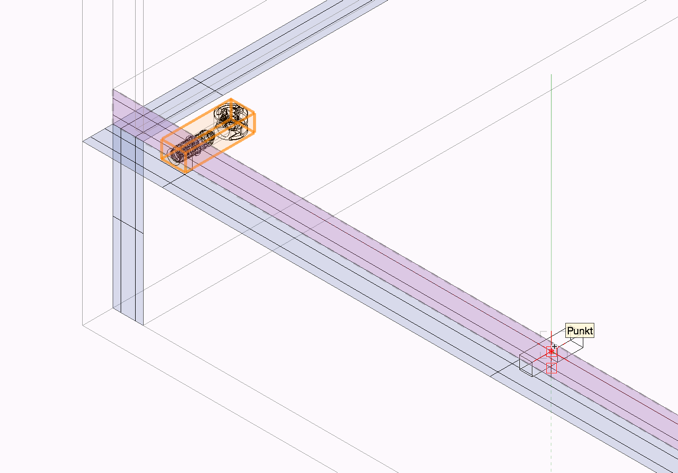
Click on a grid point to insert the connector. The tool inserts a group for the connector housing and a group for the connector bolt. If you click the top gridpoint, the housings are inserted on the top surface of the Custom Part. If you click the bottom grid point, the housings are inserted into the lower surface of the part.
Use the first method to choose whether to insert only a single connector or a connector per grid point with the next click. If a connector is selected for each grid point, you can use the SHIFT key to automatically set a connector for each grid point on all similar connecting surfaces.
