Calculations and cutting lists
Costing Example
The general process of creating costings and offers is explained below. Our example is a simple, no-frills Cabinet (Classic).
An important note before the first costing:

Select a Cabinet (Classic) to make a costing. Then choose «interiorcad > Documents > Costing...» and the following dialog will appear:
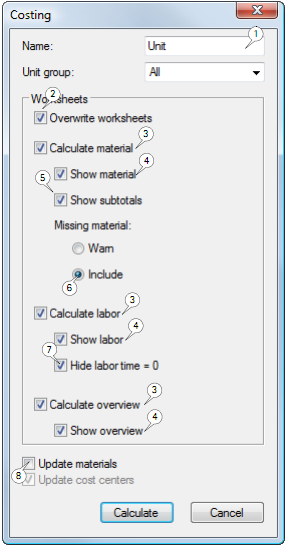
- Enter a name for the costing in the «Name» box. This name will then be printed on all worksheets belonging to this costing.
- «Overwrite worksheets» makes sure that the worksheet of any previously existing costing is overwritten and the costing is created completely from scratch. If this option is not checked, interiorcad makes no changes to existing worksheets, but creates a new worksheet with the suffix «-1». This allows you to produce costings for different variations of one object within interiorcad.
- The costing consists of three worksheets. Check the boxes «Calculate material», «Calculate labor» and «Calculate overview» to determine which worksheets will be calculated. Note that the worksheet «Overview» is a summary of the worksheets «Material» and «Labor». If you disable the costing of one of these worksheets, the worksheet «Overview» will automatically be disabled.
Check the boxes «Show material», «Show labor» and «Show overview» to determine which worksheets will be displayed after interiorcad has made the costing. If you disable these options, the worksheets will not be opened, but will still be accessible from the «Window» menu.
If you check the «Show subtotals» box, the costing will include subtotals. Base materials, coatings and finishings will be summed up separately into subtotals.This way, you will get a detailed list in which you can easily see which materials cost most.
If materials used for the unit are not found in the item master, a warning will be displayed by default. If you activate the «Include» radio button, this warning is switched off. The missing materials will be included in the list together with a special note. You can enter prices for these materials afterwards, and the costing will automatically update itself.
- Check «Hide labor time = 0» to exclude labor times calculated at 0 hours from the labor costing.
Check «Update materials» and «Update cost centers» if the materials database or cost center master has been changed (for example, from another document). This data will be copied to the current document as soon as you create a costing, and it may be that the data saved on the hard drive has different values from the data in the worksheets. Check these options to make sure that the most current data from the hard drive is used.
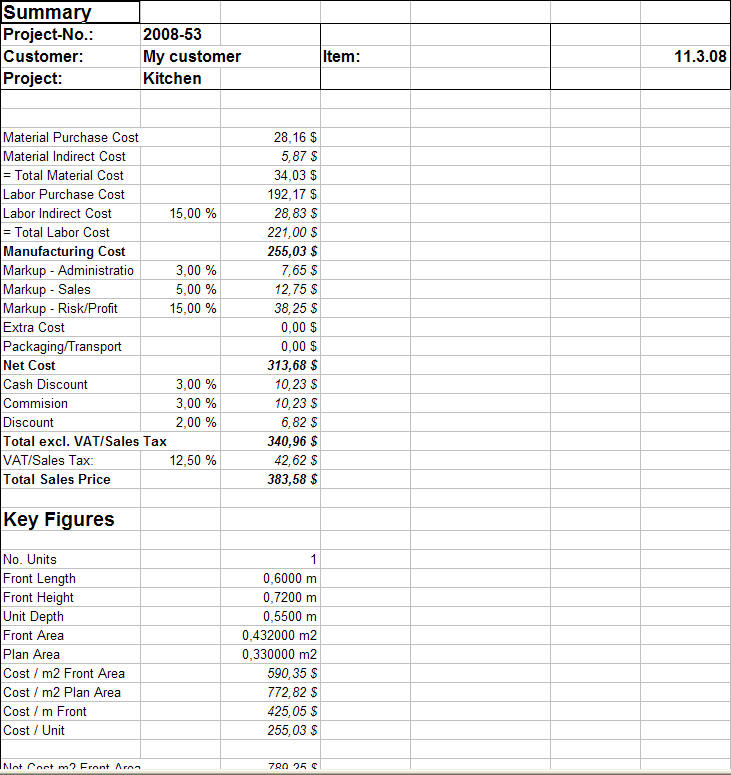
After you click «Calculate», interiorcad will make the costing and create worksheets for «Overview», «Labor» and «Material» which will be displayed according to previous settings.
The individual cells of the worksheet contain different types of data:
- Text
- Numbers
- Cell References
- Formulas
All cells using formulas are displayed in italics for easy identification.

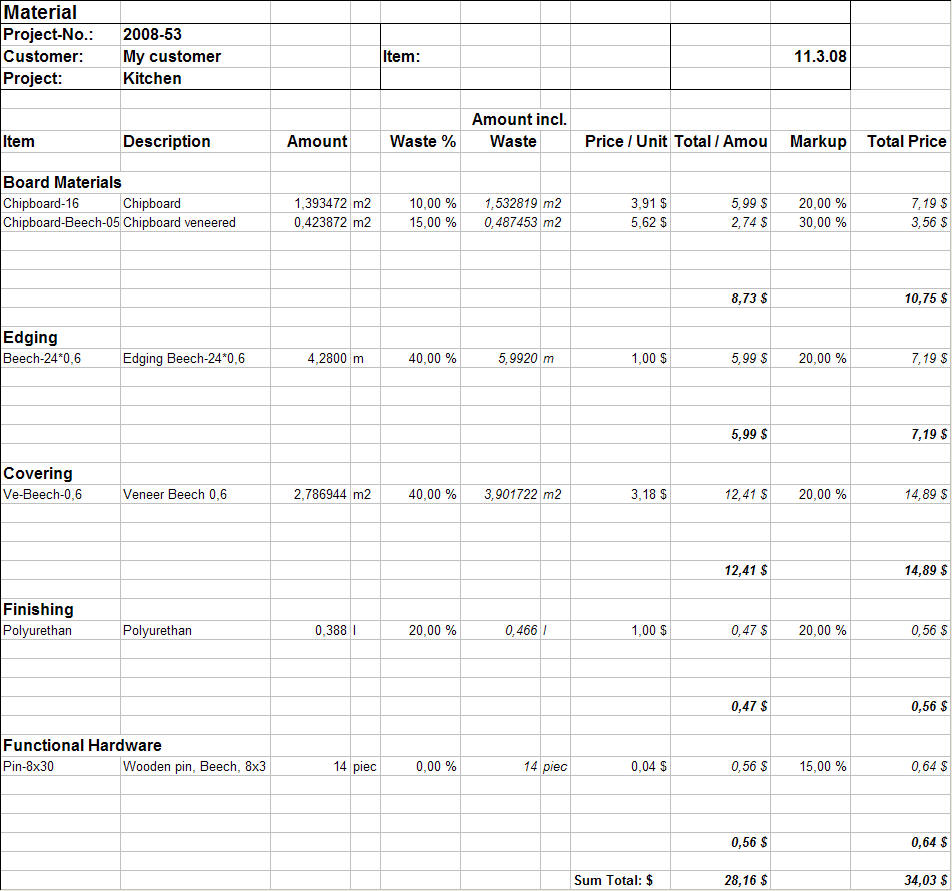
From the sample drawing, we can derive a costing...
...a labor worksheet...

...and a materials listing: