Contour 3D
The «Contour 3D 
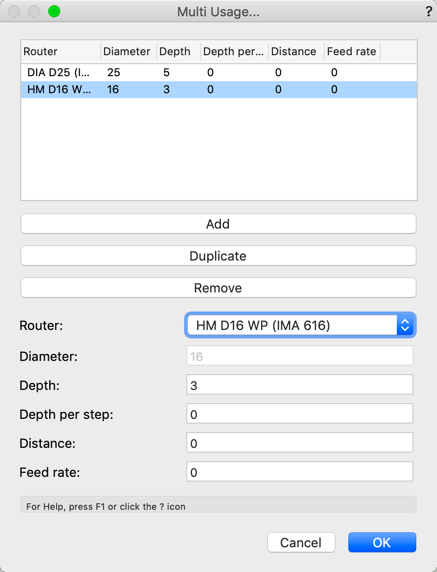
By pressing the »Multi Usage« button in the Object info palette, you have the option of cutting a contour several times using different tools. Select the tool, set it accordingly and then click »Add«. You can also duplicate or remove existing routers in the list.
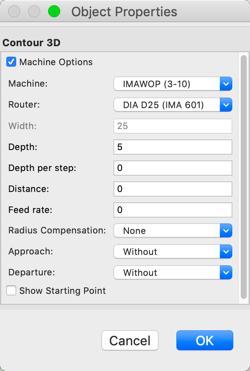
If the Radius Compensation is switched off, the drawn path is in the middle of the countour. If the Radius Compensation is switched to left, the countour will be created left of the path in drawing direction. And if you choose right, it will be created right of the path in drawing direction. Additionally you can choose the approach and departure.
The contour is processed on the CNC exactly as the polyline has been drawn - from the starting point in drawing direction to the end point. If you double-click the contour to edit the path, you can check the direction ( "Show Direction" option in the Object Info palette) and change the direction ("Reverse Direction" button in the Object Info palette).
The starting point, direction, and radius compensation are displayed as part of the contour. If changes are made via the Object Info palette, this is reflected in the model. It also carries over to production settings.
By clicking on the "Next Startpoint" button, you can change the start point of the contour. If the contour is not closed, pushing the button changes the direction.
If rectangular Custom Parts are cut on a panel saw (instead of the cnc machine), contours can be used to change the shape. If the contour is created with the depth of the Custom Part 3D and goes beyond the Custom Part 3D, then the smaller part isn't shown.